
Basic LPC845 Zephyr Support
https://github.com/dragonlock2/zephyrboards https://github.com/dragonlock2/kicadboards/tree/main/breakouts/lpc845_lin
Although I now make more than enough money to buy almost any development board, I still like buying the cheapest ones and seeing what they can do. For around $6, the LPC845-BRK was an easy choice. It’s got the standard set of peripherals, with the main standout being the switch matrix (SWM) which allows virtually any pin to map to any peripheral function. The LPC1549 also has this feature, but I’m not aware of any others. It seems like an expensive feature to add in silicon.
After working with several different microcontroller families at $DAYJOB, I realized that, outside of a few architecture-specific gotchas, everything is fundamentally the same. Once one understands that, and can write well-abstracted code, moving between microcontrollers isn’t so daunting. This is especially true with ARM, where everything from the interrupt model, the programming interface, and the ISA are standardized. Vendor IDEs can provide nice tooling to speed up development, but generally aren’t crucial. The shell, a good text editor, and the reference manual are really all one needs.
Zephyr support
Given that it’s another ARM processor, the LPC845 was the perfect candidate for my first attempt at supporting a new microcontroller in Zephyr RTOS. With excellent out-of-tree support, I didn’t even have to branch off of mainline to do this. The following is all of the files I had to add.
boards/arm/lpc845brk- This folder contains the standard set of board support files. Here we define the supported debugger, default set of Kconfig selections, and the devicetree. Importantly, you need to select the microcontroller in Kconfig and import the default
.dtsiin the devicetree. One gotcha with this microcontroller is the needed checksum to boot, which we can add using CMake to call the correct command. The other gotcha is that flashing with pyOCD sometimes fails unless I first run OpenOCD to “unlock” the chip. Must be something nonstandard.
- This folder contains the standard set of board support files. Here we define the supported debugger, default set of Kconfig selections, and the devicetree. Importantly, you need to select the microcontroller in Kconfig and import the default
drivers/- Here we can add drivers that implement the appropriate API. Zephyr has helpers and subsystems that build upon this low-level API implementation. I’ve added ones for
gpioandserial. Since NXP, as well as most other vendors, provide a HAL that abstracts away the low-level register manipulation, most drivers, including the ones I wrote, are mostly thin conversions between the Zephyr API and the vendor API. The most complex part is usually managing state and interrupts since we have to be as flexible as the API requires.
- Here we can add drivers that implement the appropriate API. Zephyr has helpers and subsystems that build upon this low-level API implementation. I’ve added ones for
dts/arm/nxp- This folder contains the default set of devicetree configurations that boards import. This is where we define the CPU type, flash size, RAM size, and available peripherals. For each peripheral, we generally need to specify the driver, memory address, clock, and interrupts. Since I didn’t use the
pinctrlsystem most other microcontrollers use, I also specify the SWM pin functions for each peripheral here.
- This folder contains the default set of devicetree configurations that boards import. This is where we define the CPU type, flash size, RAM size, and available peripherals. For each peripheral, we generally need to specify the driver, memory address, clock, and interrupts. Since I didn’t use the
dts/bindings- This folder contains a set of YAML files that define what properties are available to set in for peripherals in the devicetree. These are the properties that the drivers need when doing their configuration. The devicetree parser will enforce any requirements and defaults.
include/zephyrboards/dt-bindings- This contains a set of header files that can be imported into devicetree configs to provide constants. Since full C isn’t supported in devicetree, ports usually copy constants here for use. I added peripheral clock mappings in
lpc84x_clock.h. Since I didn’t want to figure out the wholepinctrlsystem, I added constants tolpc84x-pinctrl.hfor pin selection and let the drivers do more of the heavy lifting for pin configuration.
- This contains a set of header files that can be imported into devicetree configs to provide constants. Since full C isn’t supported in devicetree, ports usually copy constants here for use. I added peripheral clock mappings in
soc/arm/nxp_lpc/lpc84x- This is where support for the base microcontroller is added, without any peripherals. Here we use Kconfig to configure the number interrupts, choose the CPU architecture, select any architecture-specific options, and enable drivers. Importantly, I believe the
HAS_MCUXflag triggers the NXP HAL to be compiled, although I still had to add a few files specific to the LPC845 inCMakeLists.txt. The linker script is also here, but we simply import the architecture specific one. Last but not least, clock configuration is generally done insoc.cwhich I kept simple and just used the 30MHz internal oscillator.
- This is where support for the base microcontroller is added, without any peripherals. Here we use Kconfig to configure the number interrupts, choose the CPU architecture, select any architecture-specific options, and enable drivers. Importantly, I believe the
Doing all of the above can sound quite daunting. The first step is really just to get the microcontroller booted and running main() at all, no gpio or serial drivers needed. You can use the debugger or even just call into the vendor APIs to check this. To get here, you really only need the boilerplate board files, basic devicetree without peripherals, and the basic set of Kconfig selections in the soc folder. Once you have Zephyr booting, then you can proceed to add driver support for each of the peripherals. Remember, you can hardcode as much as you want during development. Start from a known good state, then change things one at a time.
lpc845_lin
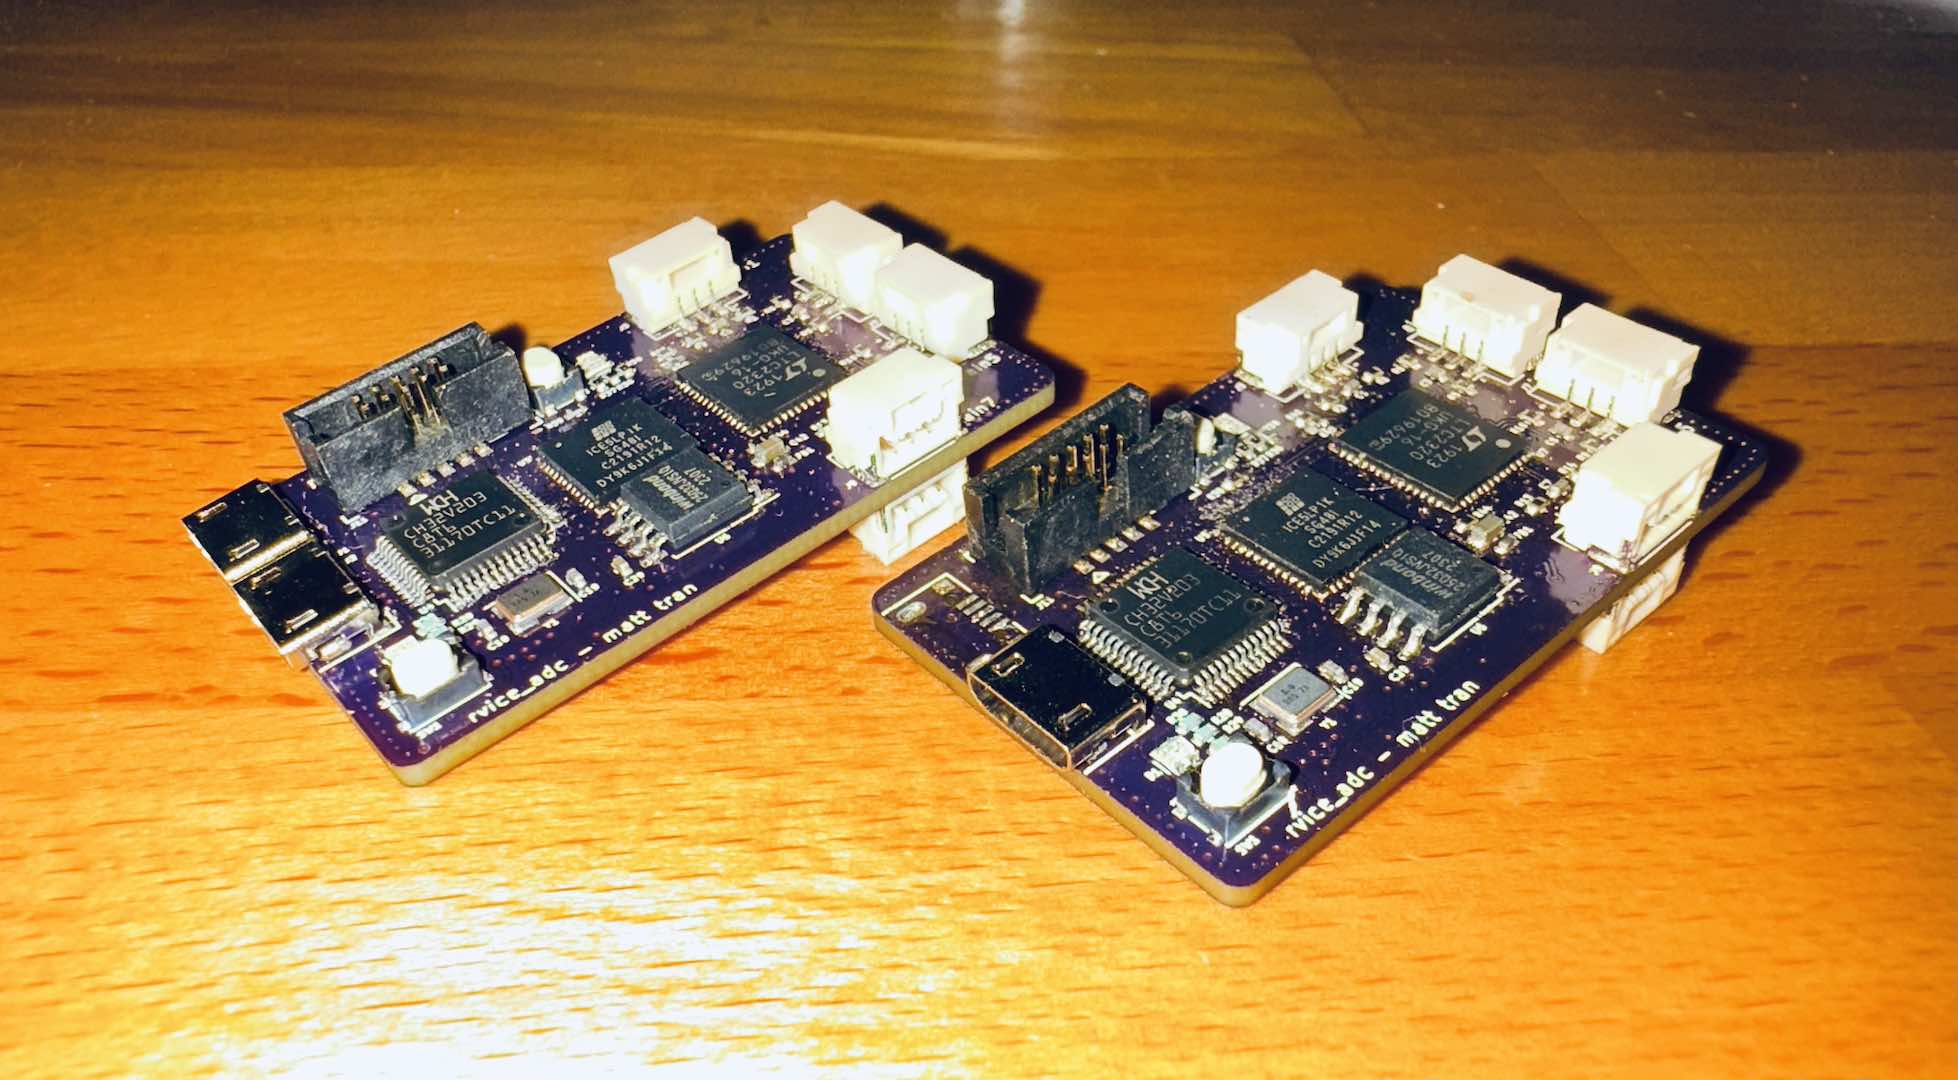
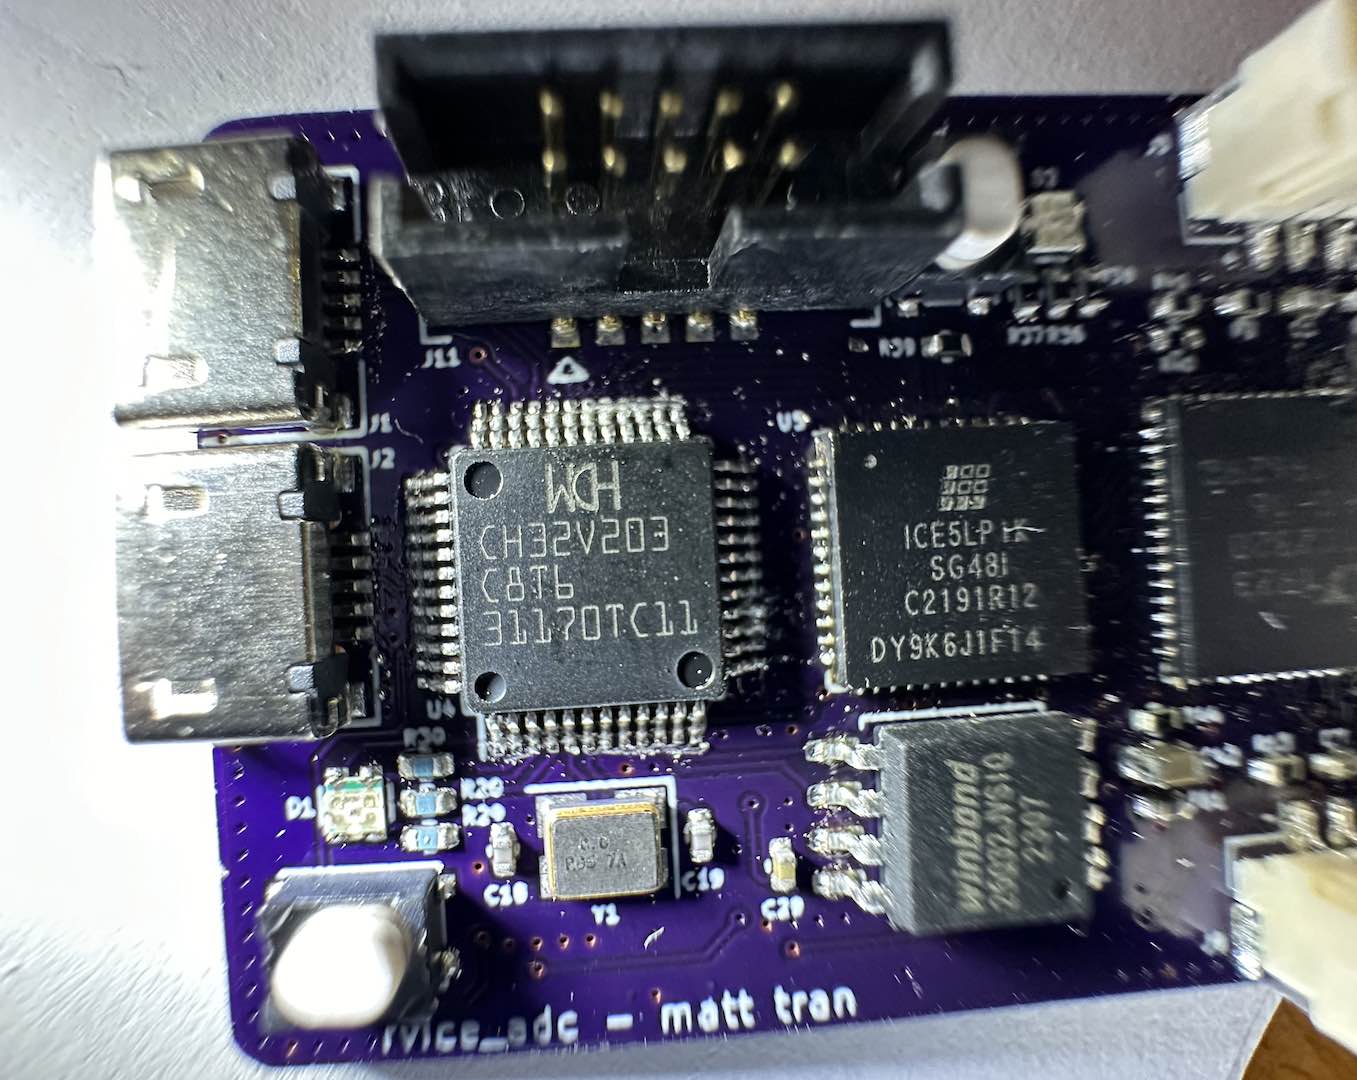
Since I had a couple of LPC845 samples laying around, I decided to build a board. I’ve always wanted another LIN board to use with JABI, so I designed a USB to 4x LIN converter. Since I didn’t have any LIN transceivers, I tried designing my own. The first design is what I used with attiny10_lin which uses a single FET level shifter. Since current sink capabilities are limited by the IO pin used, I did a second design which uses two BJTs for TX and one diode for RX. The layout was definitely easier due to the switch matrix, but probably not to the extent that justifies the additional cost.
As expected, it mostly worked! I had to do a complete refactor of my LIN API since it required a ridiculous amount of memory for storing queued frames. The LIN transceivers both break the LIN specification since the slew rate is too steep and voltage levels defining high and low are far stricter than required. I also didn’t have a CP2102N and only a CP2102, so couldn’t test the LPC845 bootloader. Still, very happy with the outcome.
Comments